You will need the following items for the programming process and subsequent control of the LED strip:
How to program LED strip lights with LedEdit?
How to Use LEDEdit 2025 Software
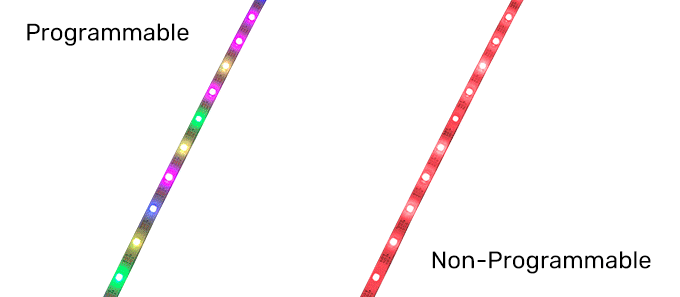
Select Programmable LED Strip
There are many types of programmable LED strips, such as SPI LED strips WS2813, UCS1903, etc., as well as DMX512 LED strips TM512AC, etc., each with its own unique features. When choosing, consider factors such as color, color accuracy, brightness, and individually addressable LEDs.
Choosing the Right Power Supply
Make sure your addressable LED strip gets enough power. To program with LedEdit and the K-1000C controller, you will need an external power supply. Some LED strips can be powered by a DC 5V power supply, and some addressable LED strips require a DC 12V or DC 24V LED power supply. Again, please read the specifications of the LED strip before using it.
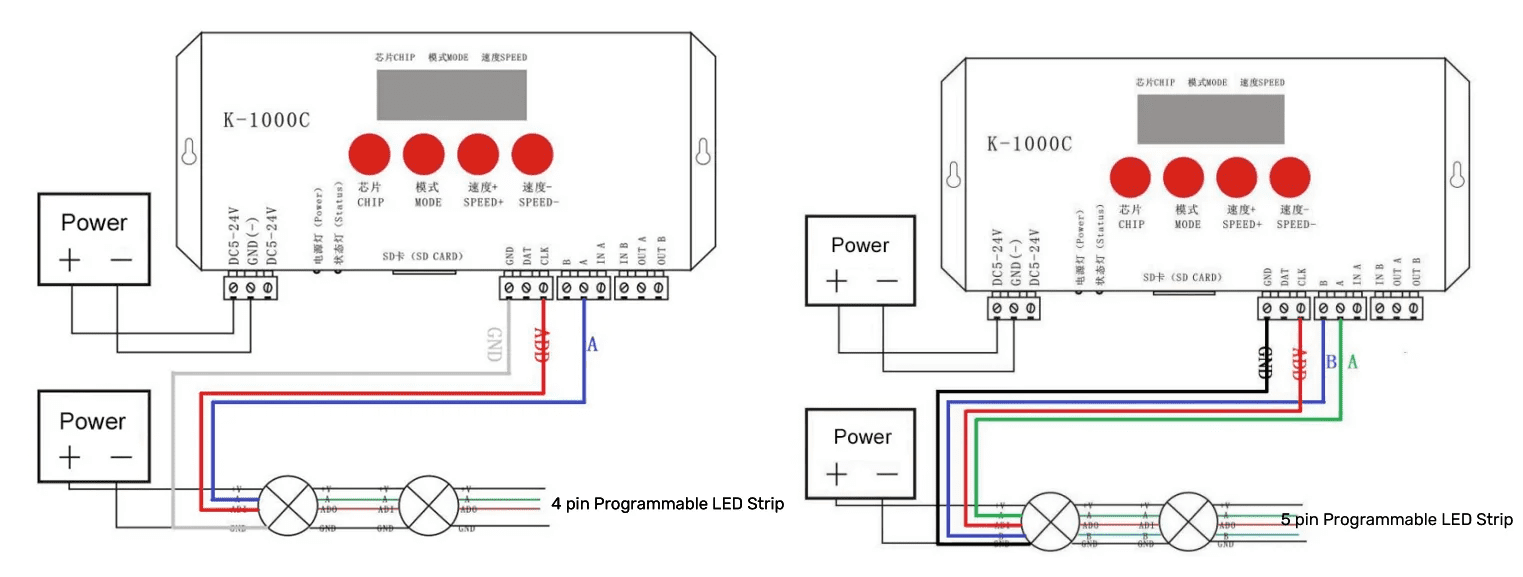
How can i Connect the LED Strip to the K-1000C Controller?
3-pin (V+, D, GND), 4-pin (V+, D, B, GND), and 5-pin (V+, P, A, B, GND) are three common connections for programmable strips. The difference between them is the availability of a spare signal line and an in-line address line. The spare signal line maintains the stability of the entire LED lighting system. V+ and GND are the positive and negative power supply lines, D, A, and B are the data lines (see Common Pin Descriptions above for details), and P is the in-line address line.
The K-1000C is a popular controller for programming SPI and DMX lighting effects. Below is the wiring diagram for connecting the K-1000C DMX controller to 4-pin, and 5-pin programmable light strips:
Programming Steps
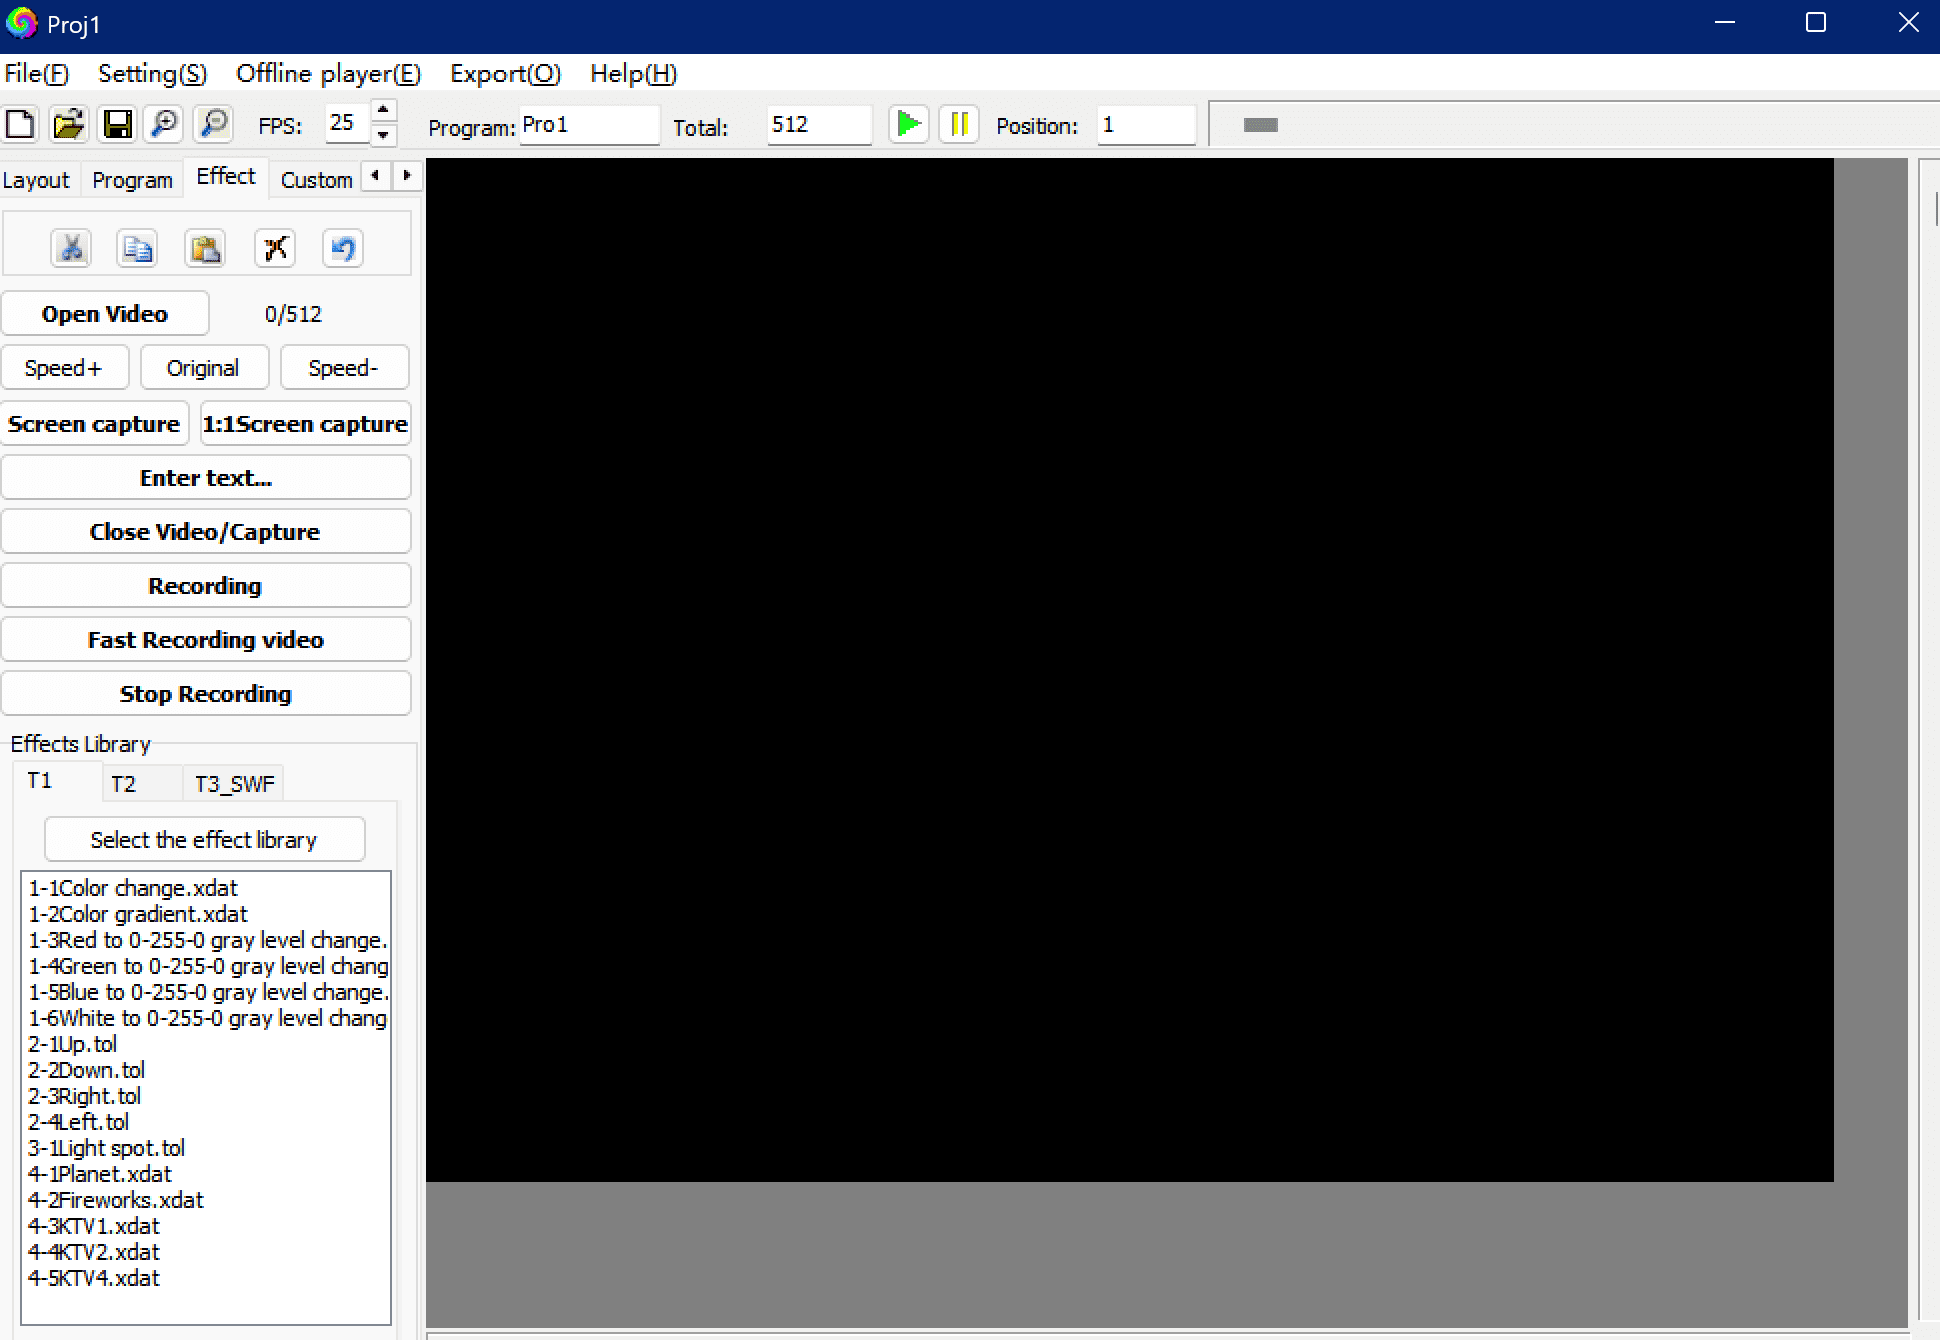
LedEdit is a popular software among programmers who program LED panels or pixel LED strips because it is powerful and easy to use. As you probably know, LED Edit and LED Edit-K are two different versions with different options and interfaces. The following programming steps use LED Edit-k as an example:
1). Create a new editing project. This will display the New Project window. Select the controller you want to use from the “Controller Type” list and enter the maximum number of LEDs to be used per port in the “Maximum number of lights per port” field when creating the LED layout.
2). Set LED layout. LED layout is the representation of the physical layout of LEDs. There are two ways of LED layout: manual layout and automatic layout. For shaped and simple fixture layout, manual layout can be used; automatic layout is usually used for editing test programs or when the actual fixture is installed in a regular layout. Note: Please make sure your physical LED connection is the same as the connection shown in the layout.
3). Record video or animation. To program the Pixel LED Strip by recording an animation or video, you can either click on the “Open Video” button and select a video or animation from your computer, or you can select an animation from the effects library. With the animation or video selected and the video playing in the background, it is now time to record it. Once you have recorded the video or animation, use the Play button to play the animation to see if it is the result you want. If not, continue editing the video. If it is, it’s ready to export.
4). Exporting the project. In order to export the programmed lighting project correctly, please select “Generate and Export LED/Bin File,” which will open the Export Settings window, then select the LED Driver Chip from the Chip Selection List, and finally, in the Browse for Folder window, select a location to save your.led file. Finally, in the “Browse for Folder” window, select a location to save your.led file.
5). Play the effect file. Copy the saved.led file or.bin file to the SD card, then insert the SD card into the K-1000C controller; the controller will be powered on normally to play the programmed effect file.